(27.3.2020 – article is still in progress, will be updated soon)
As I mentioned here (there’s also links to buy parts separately there) I get some cheap Cloud 149 3″ cinewhoop.
Its cheap, but not ideal. But after some mods, it is perfect Gopro holder with ReelSteady GO ability
Introducing you VILKO – Cloud 149
There’s few issues with the frame, which my build is trying to solve:
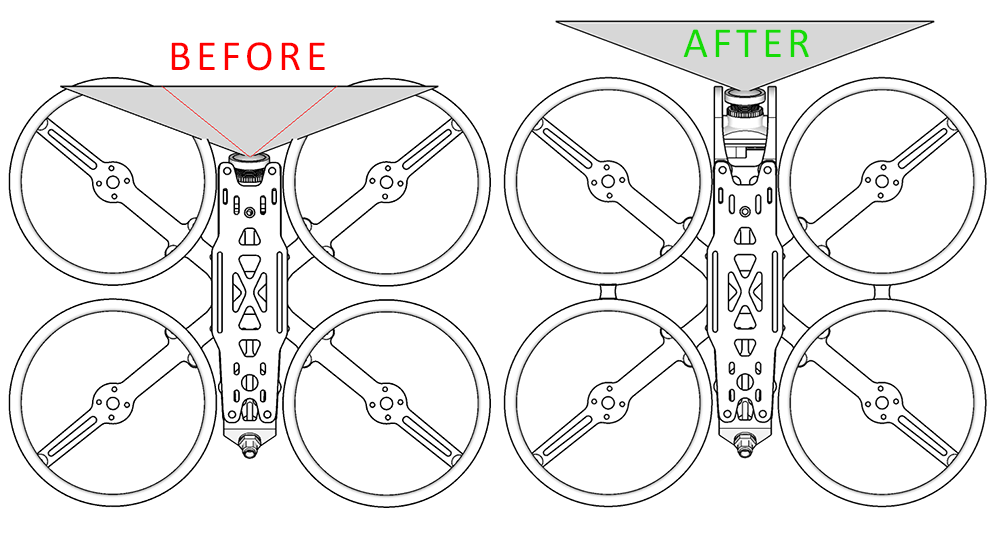
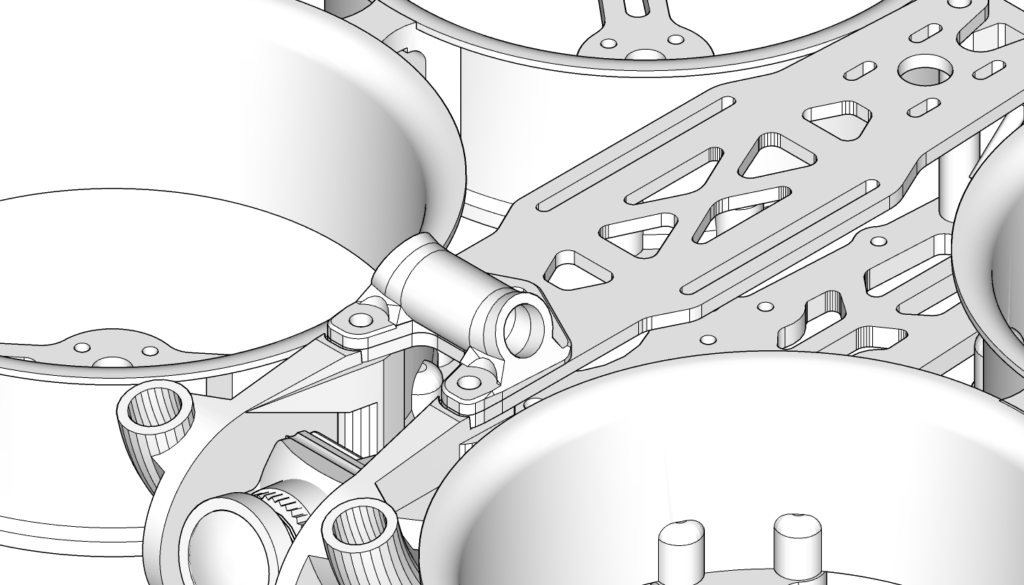
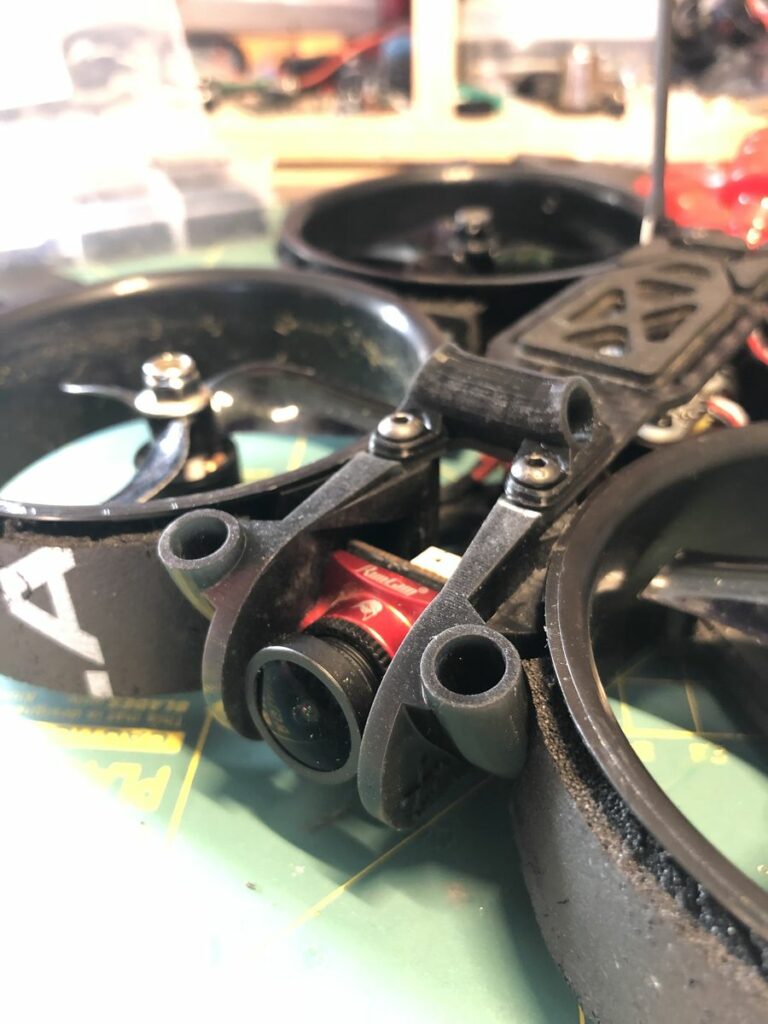
- FPV camera is drown into frame whats causing visible rings in view. My 3D spacers will move camera around 30mm forward with no ring in view
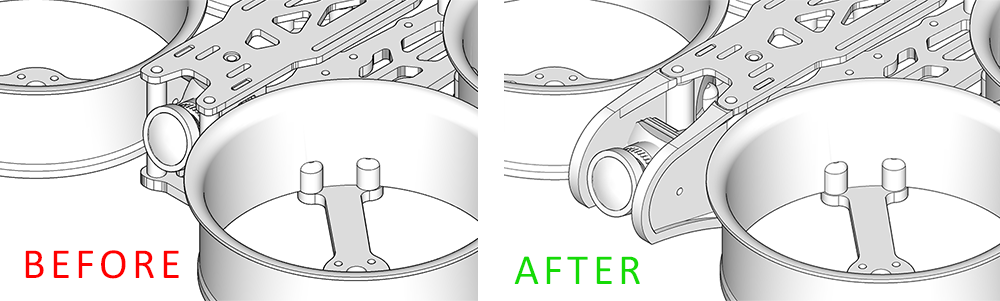
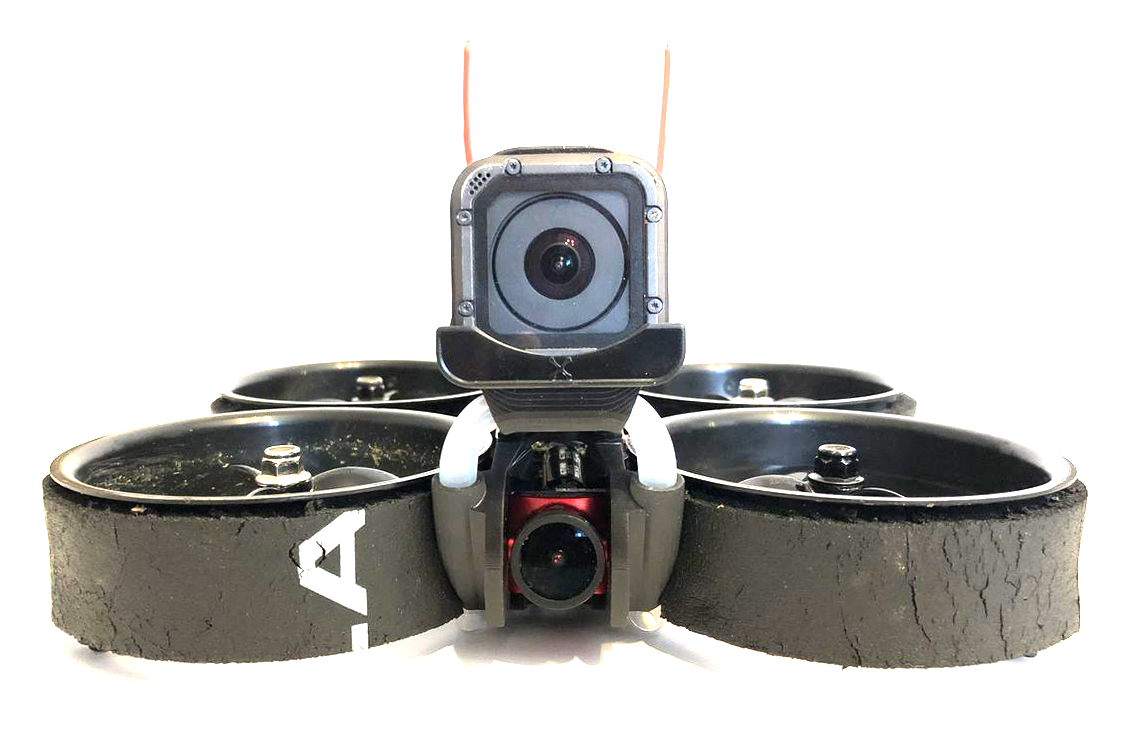
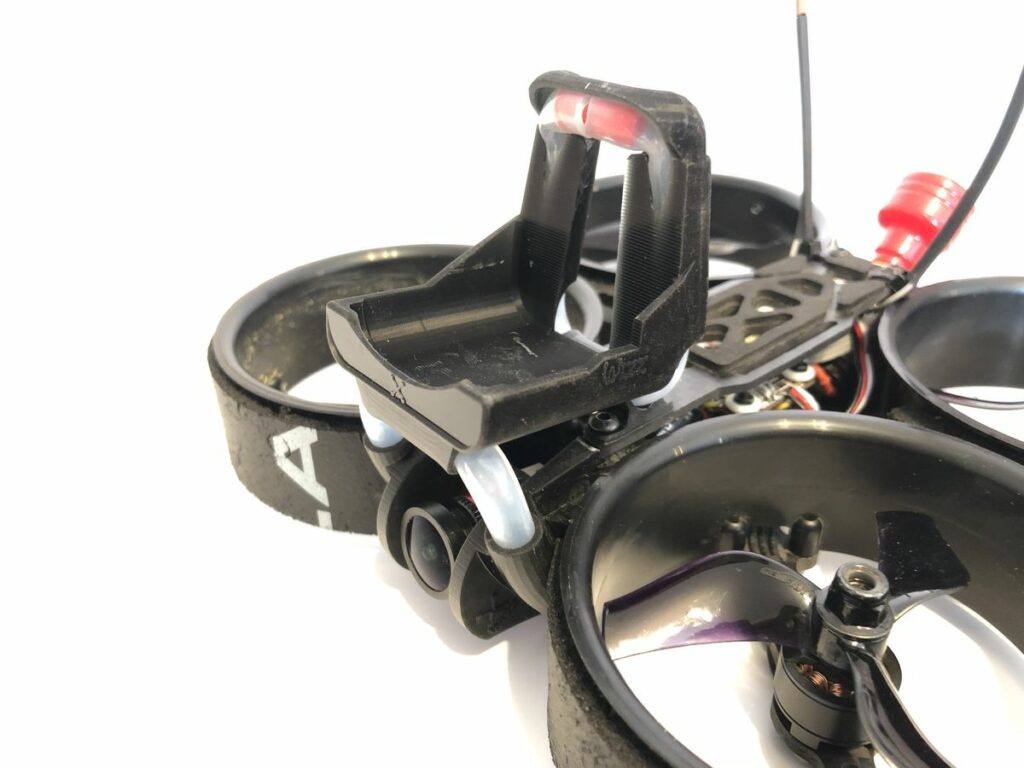
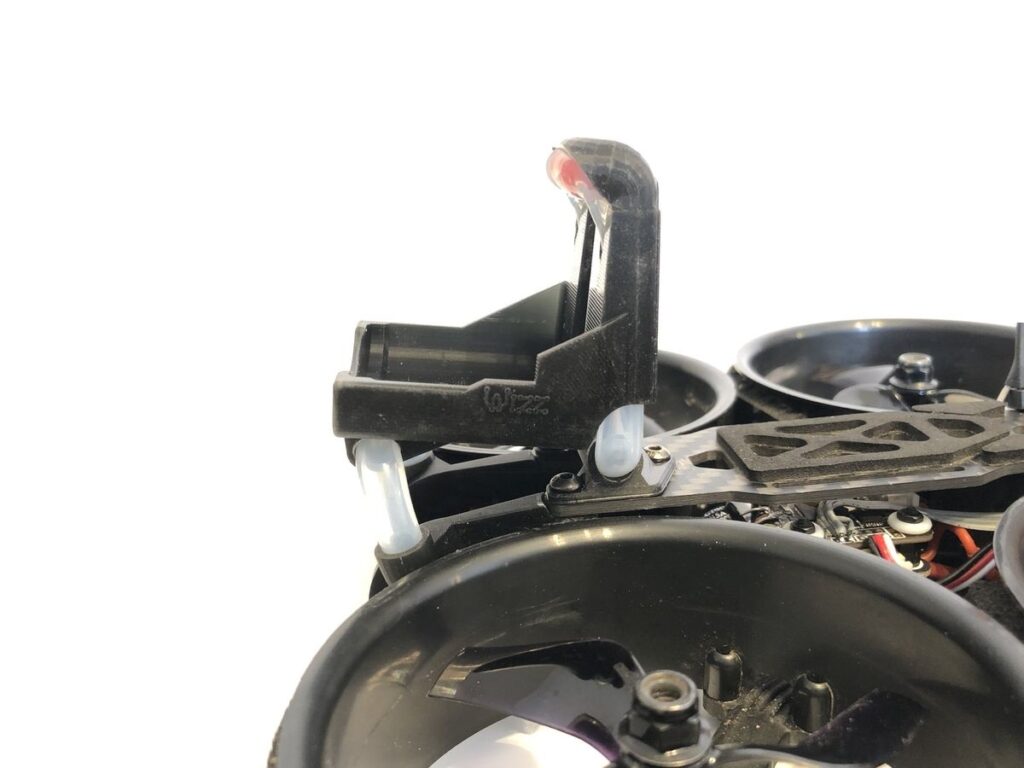
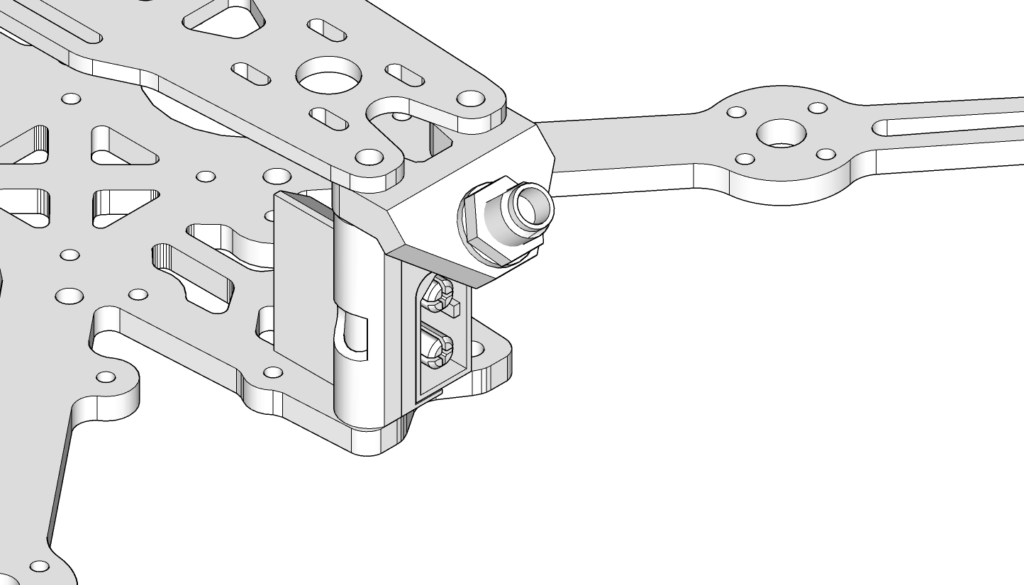
- With Gopro on triangle foam fixed with battery strip video is quite shaky. With ReelSteady even more shaky. So Inspired by Nicecrash and create similar design of Gopro Session 5 holders dumped with silicon tube. Also there’s really easy to replace Gopro (pushed also with silicon tube) from fixture as well as it is possible to remove SD card without taking it out from fixture
- It flyes pretty lazy, but I can take this partly as advantage, as it is possible to fly slow and precise.
- Lack of motor and ESC power in case of that hi throttle is needed. Those 2 points will be solved later probably by replacing ESC (25A) and motors with higher KV
- There’s no foam around rings and rings are connected only with 3 screw and no more dumping between them and frame.
My 3D printer:
Most of the modifications (described in stage 2) are done with 3D printed parts. I designed all of the parts by myself in Sketchup, and all the 3D models I’m sharing for free (but off course you can support me)
I have SLA LCD 3D printer (Anycubic Photon S) and using UV resin and I’m using Tough ressin.
It is really precise to use SLA LCD prints (0.05mm) but on another side resin is tough but also fragile if you crash.
I already waiting for Flexible resin, but i will probably change design a bit for that.
First stage – basic BUILD (Second stage above with my special mods):
So lets start with disassembly RTF drone and “make things better” a bit as wire addressing looks terrible.
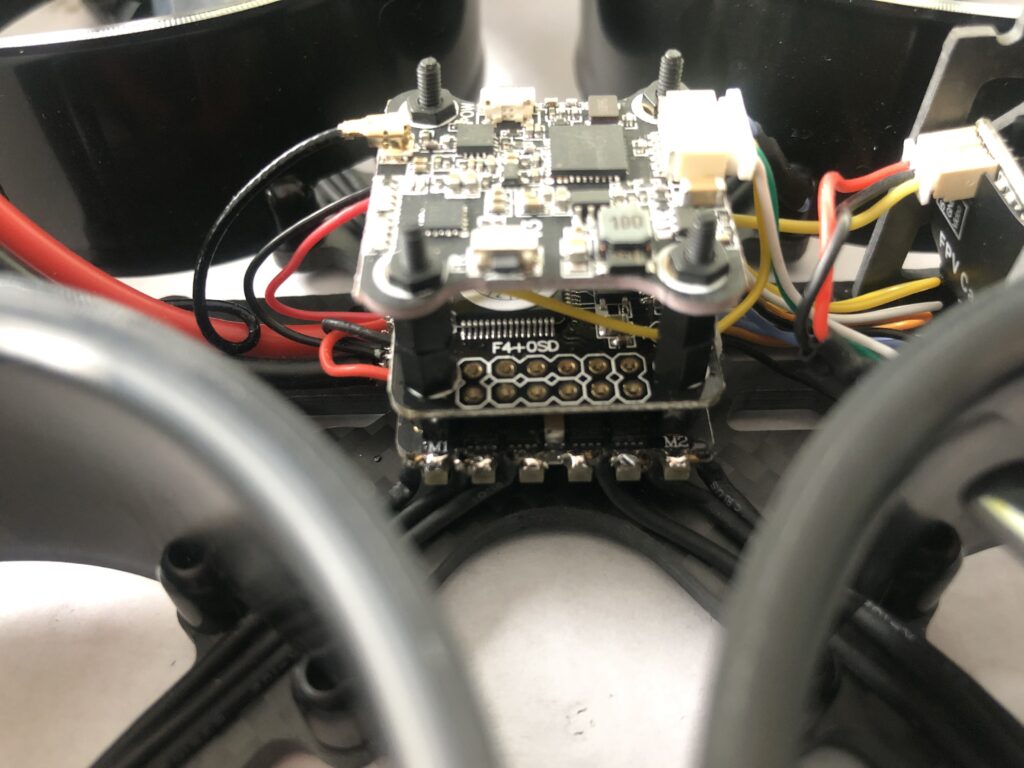
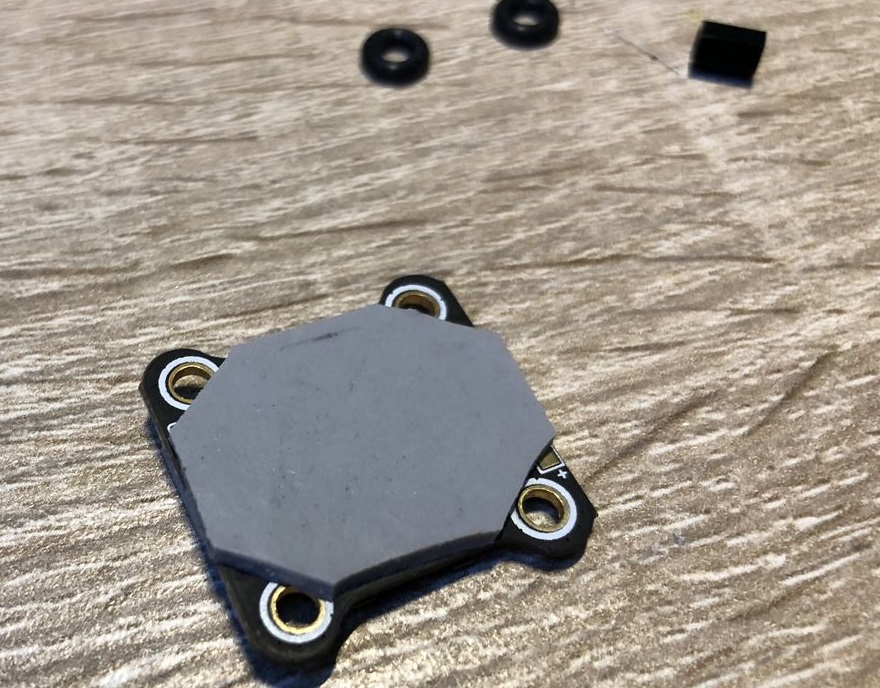
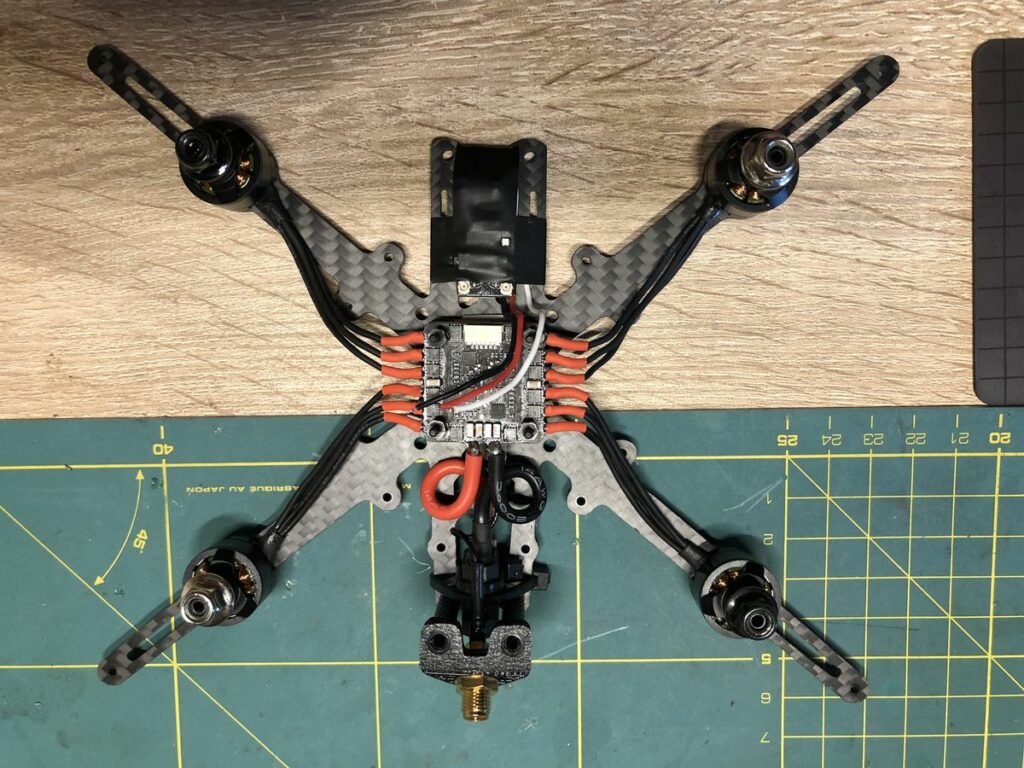
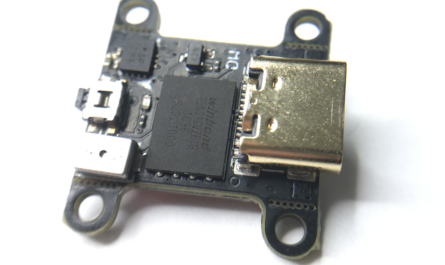
- As first I would like to place VTX (Mini 5848 VTX 48CH ) on the frame with Heat transfer pad (as carbon is quite good heat conductor) it can take some heat. I’m using 2mm one, but it can be thiner.
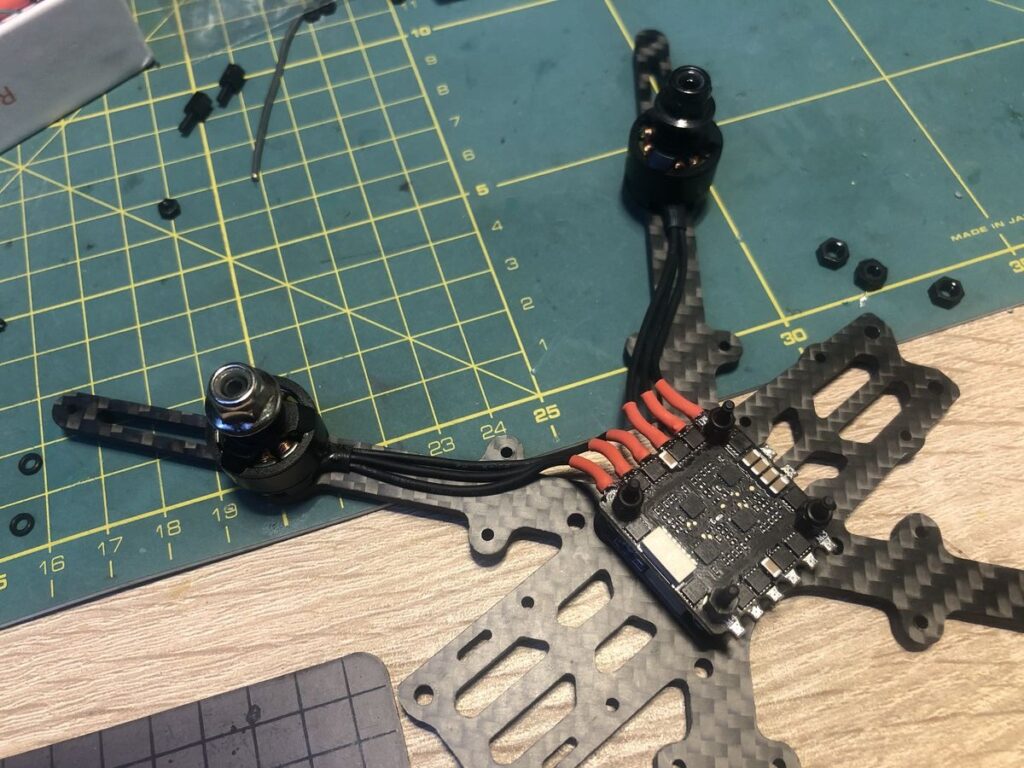
- Put ESC on top of that VTX via some diameter 2mm spacers, rewire motors and add heatshrinks on cables
* Add XT60 socket, fix with cable strips, test if soldering is OK with “smoke stopper” with 12V 15W bulb from car and USB tester (32V/5A) in series. Seems that we have LED lighting and no bulb lighting – that’s perfect
- Put Receiver on double side tape to the front part of frame. My is R12DSM from radiolink
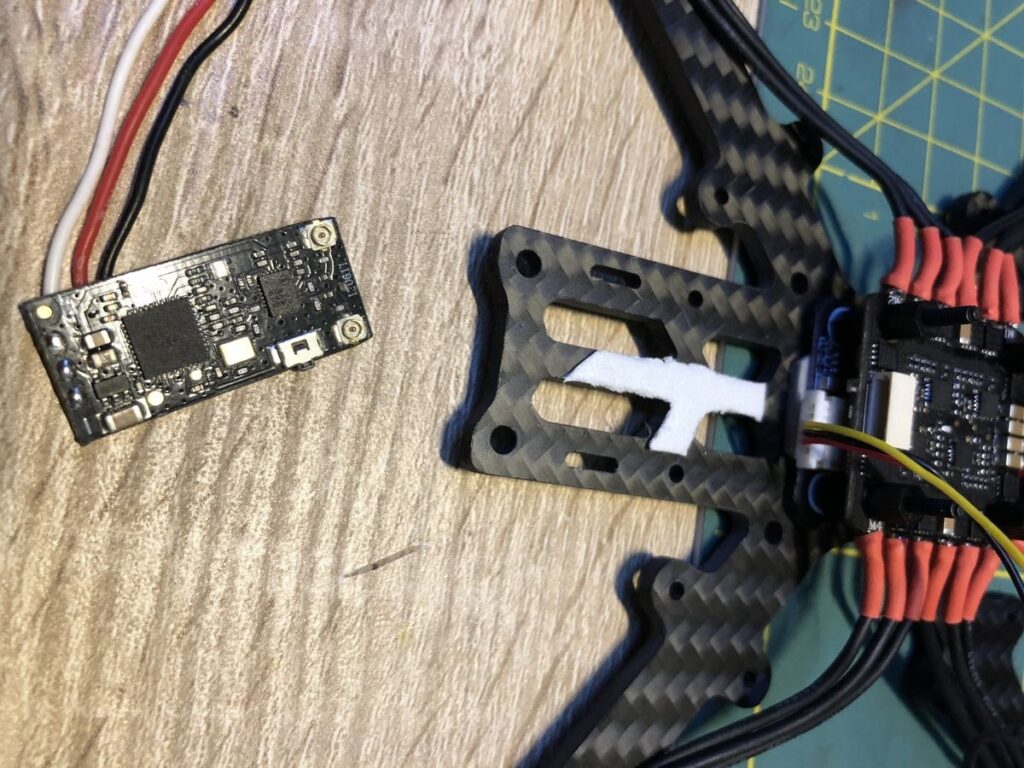
- Add insulation tape on it just for sure. Also can connect VTX xable to VTX
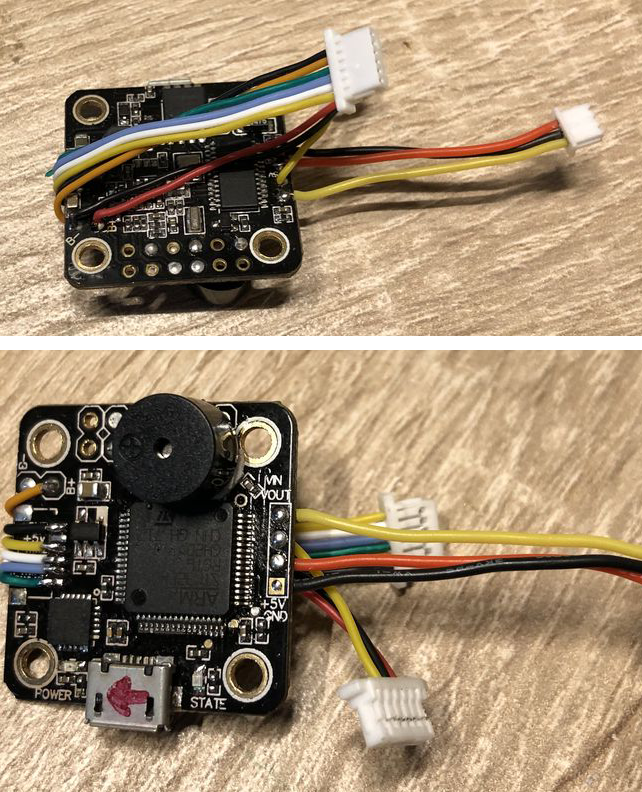
- Shorten cables on FC – I removed ESC socket and solder cables directly as there was no battery pin on socket
also solder buzzer directly on FC and glue with hot-melt. I did not, but you can twist the cables.
- Solder 1000uF/35V capacitor to battery pads on ESC, and I use also 1000uf/6.3V to 5V (video feed), put some zips for antennas on arms as well as fix the motor cables with tape.
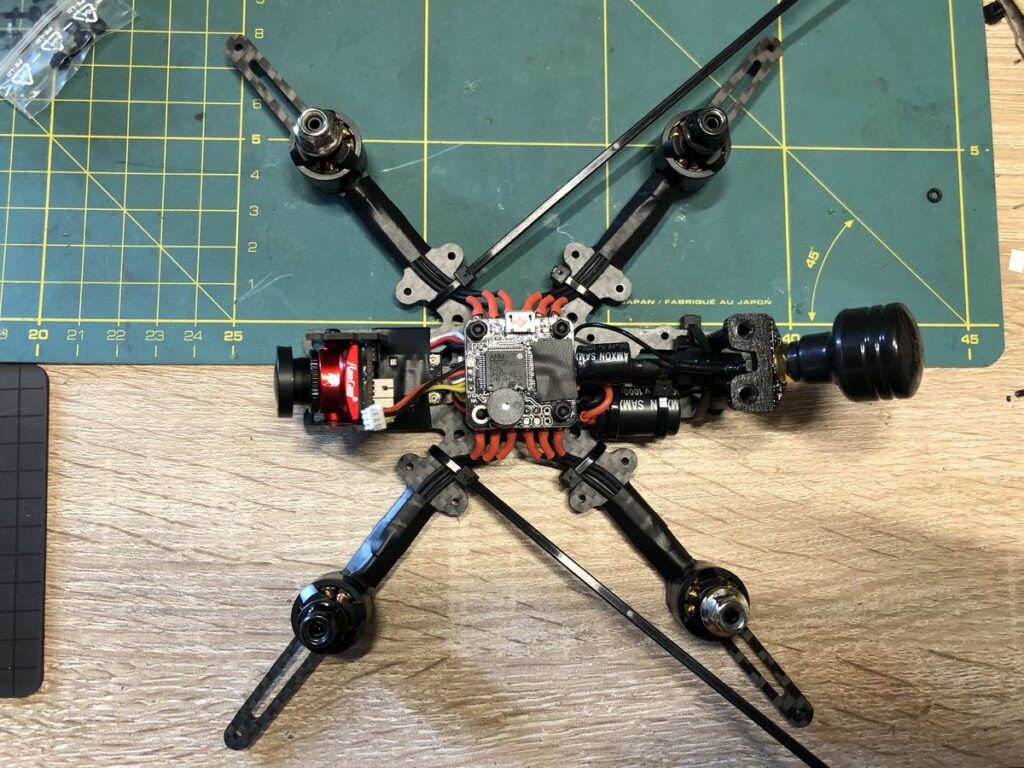
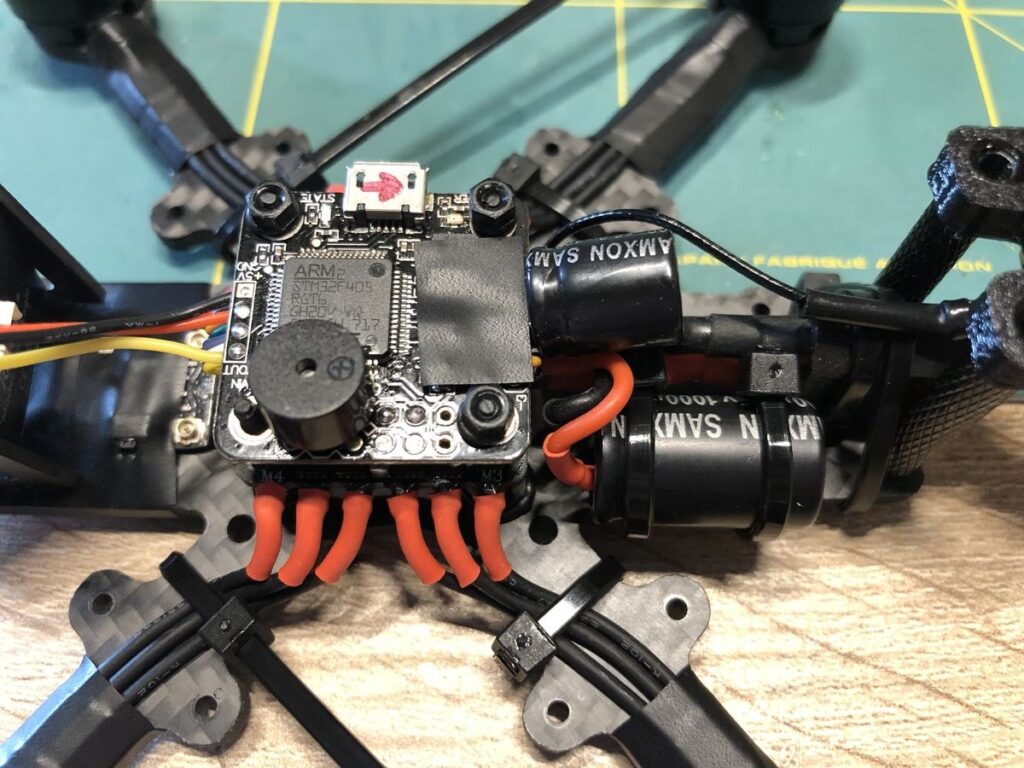
- Connect antennas to RX and add some heatshrink on zips. There’s rings and camera on pictures, but we will put it later
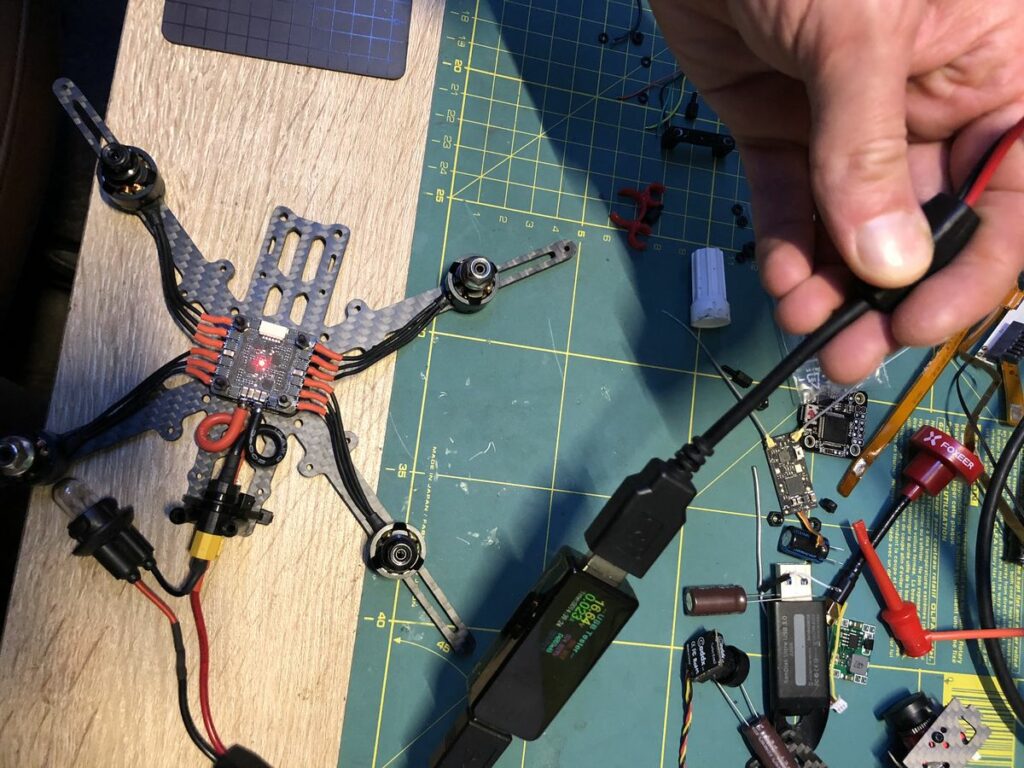
First stage is ready, and you can go to Betaflight configuration as original one is 3.5, update latest Betaflight, activate RPM filter and update ESC to biderictional. Im using 48Khz method with target G_H_30_48_REV16_77.HEX
Thank’s Oscar for perfect guides.
- Now get some beer or coffee or booth and reward yourself 🙂 than go to next stage

Second stage – my mods:
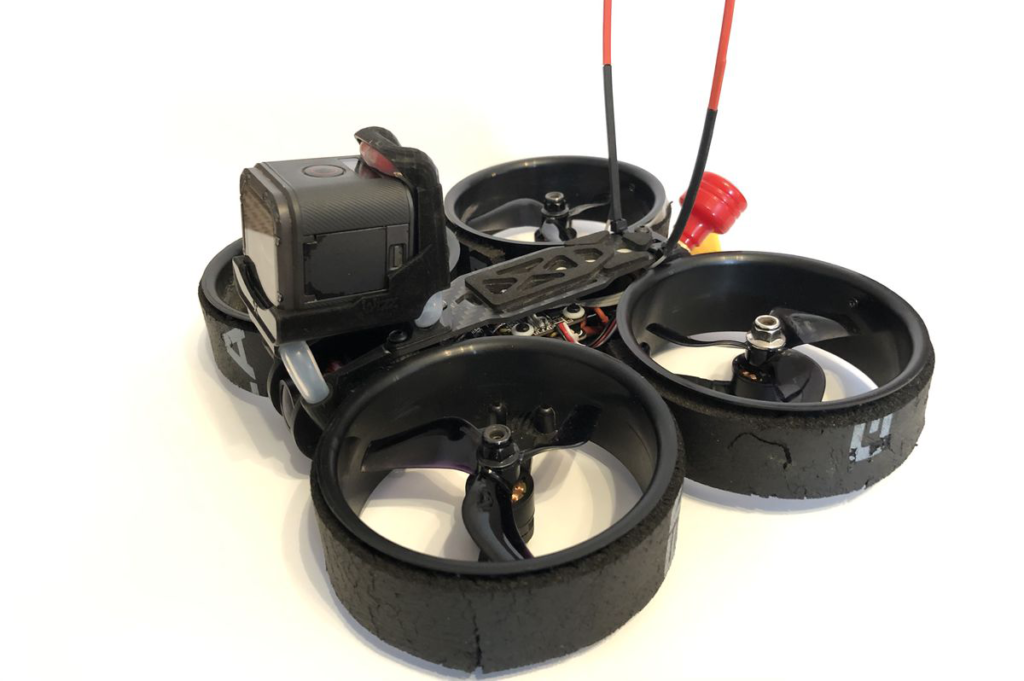
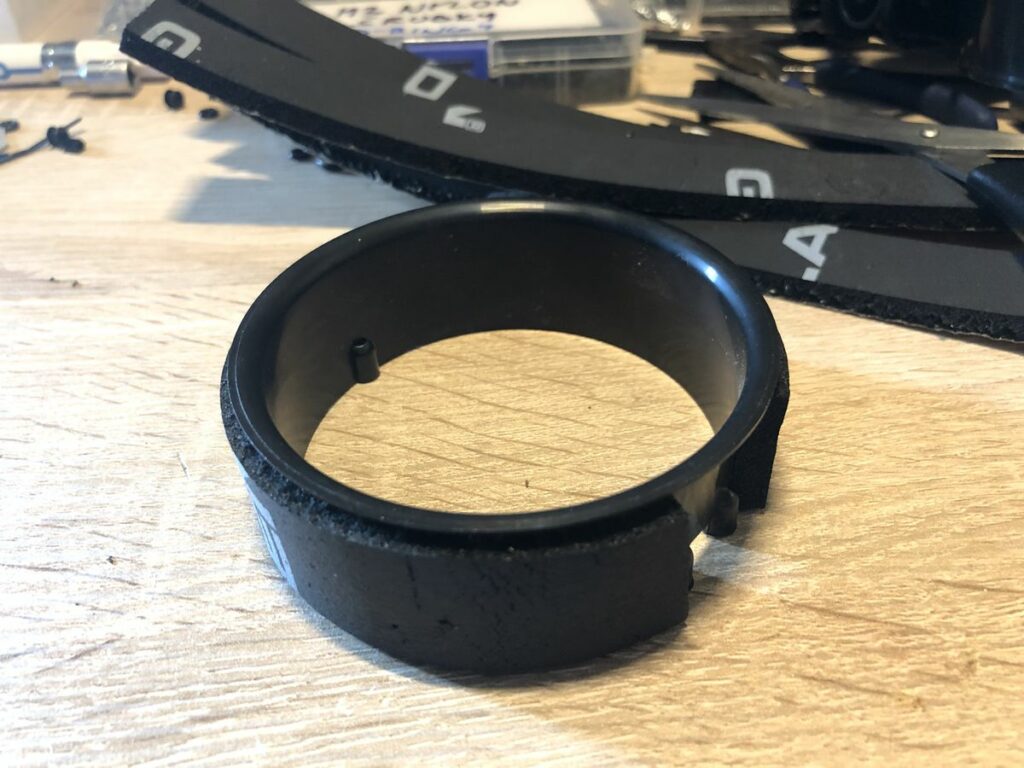
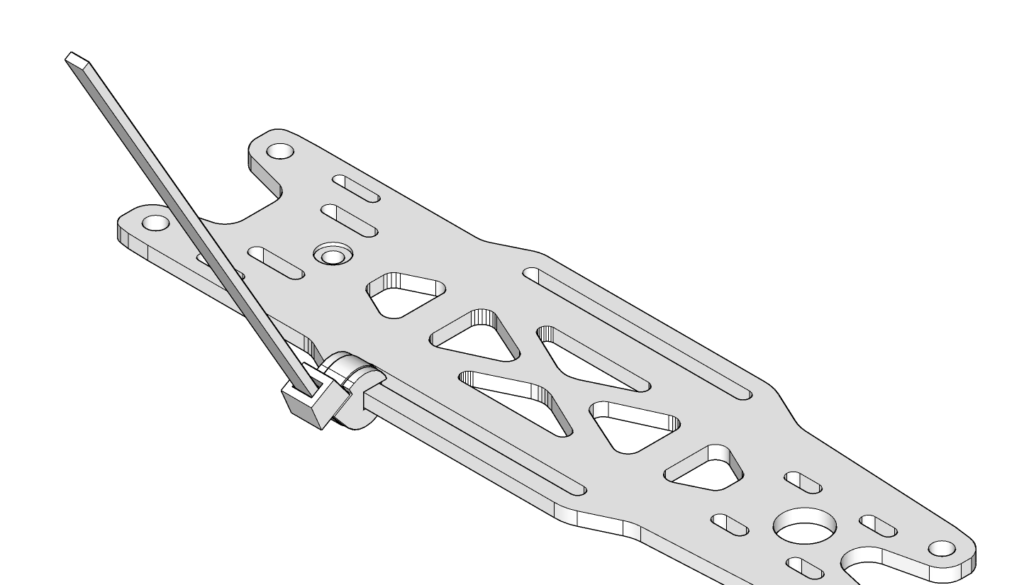
- Cheap Ring self sticking foams from some car insulation. I have spare GLADEN car noise insulation foam, around 6mm thick and cut around 25mm /250mm plates from it.
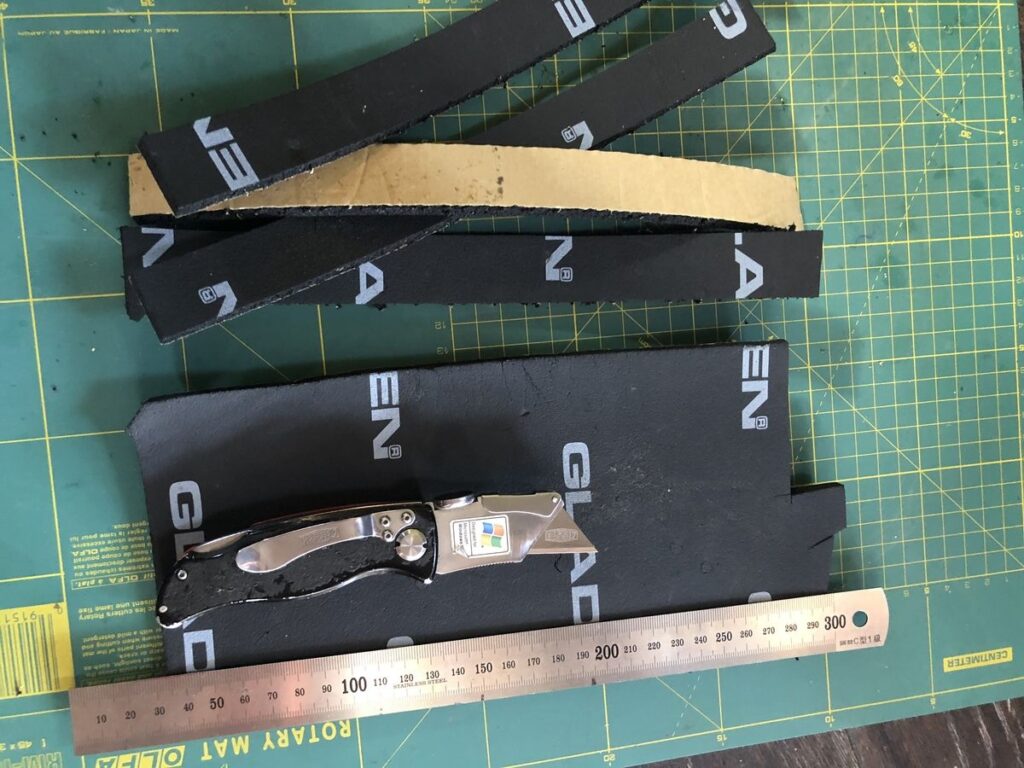
- Stick those foams around the rings, normally can go around all around.
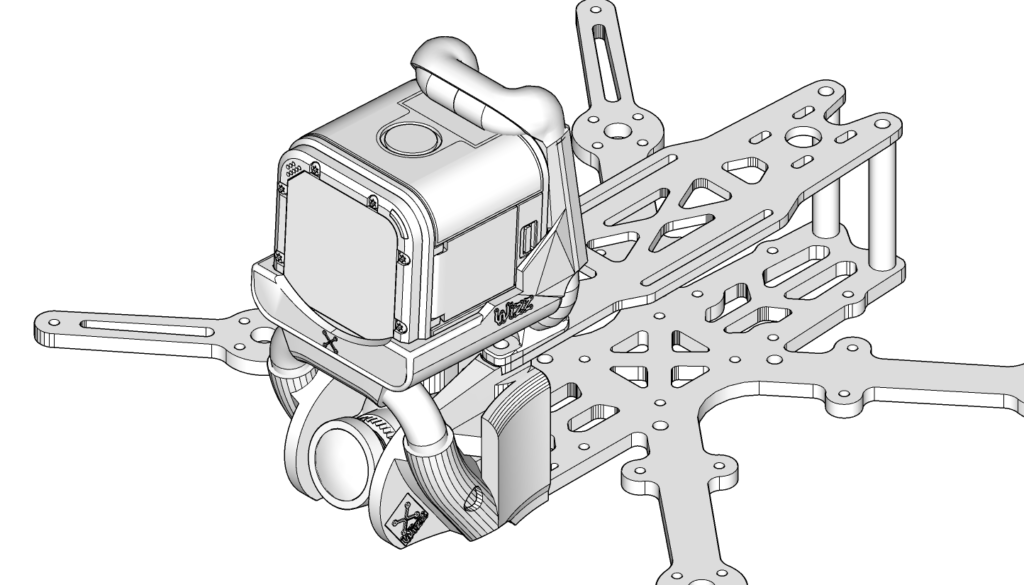
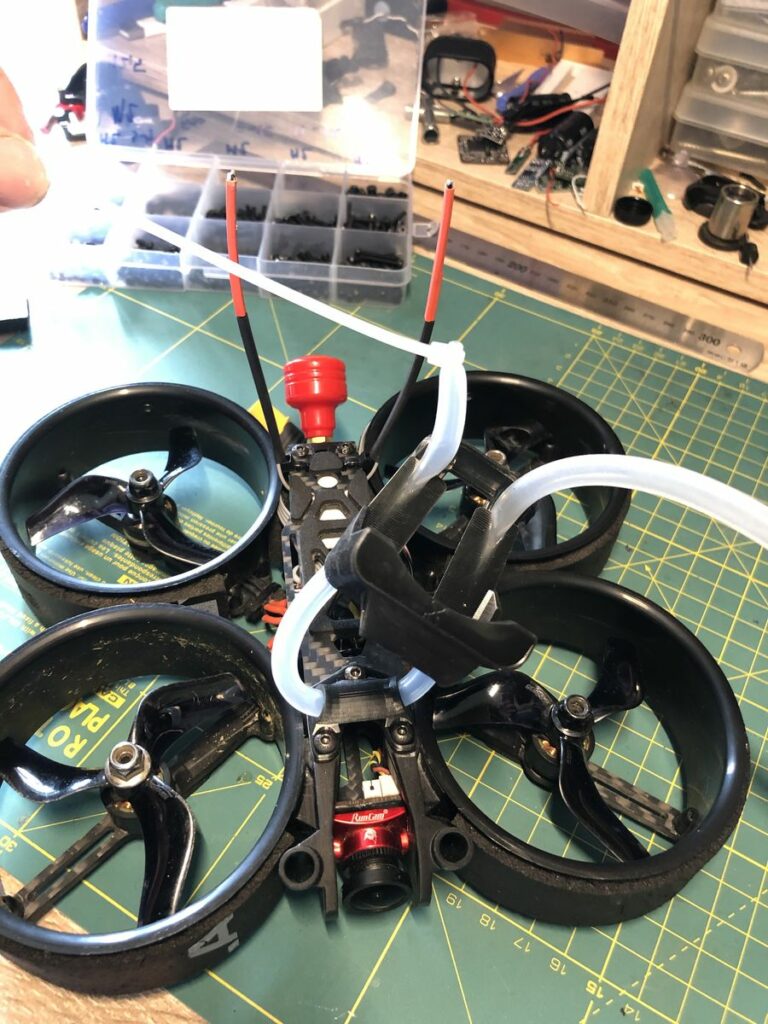
- Camera holder to move rings out of camera view. I created 3 versions of camera extender
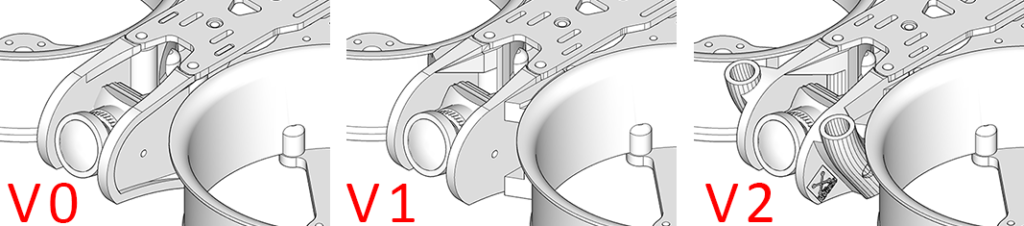
V0 – this is just a light extender (3D model here)
V1 – More robust extender with possibility to screw to rings (3D model here)
V2 – Final version with tubes for mount Gopro fixture via silicon tubes (3D model here)
So back to build and put 3D printed extenders on spacers
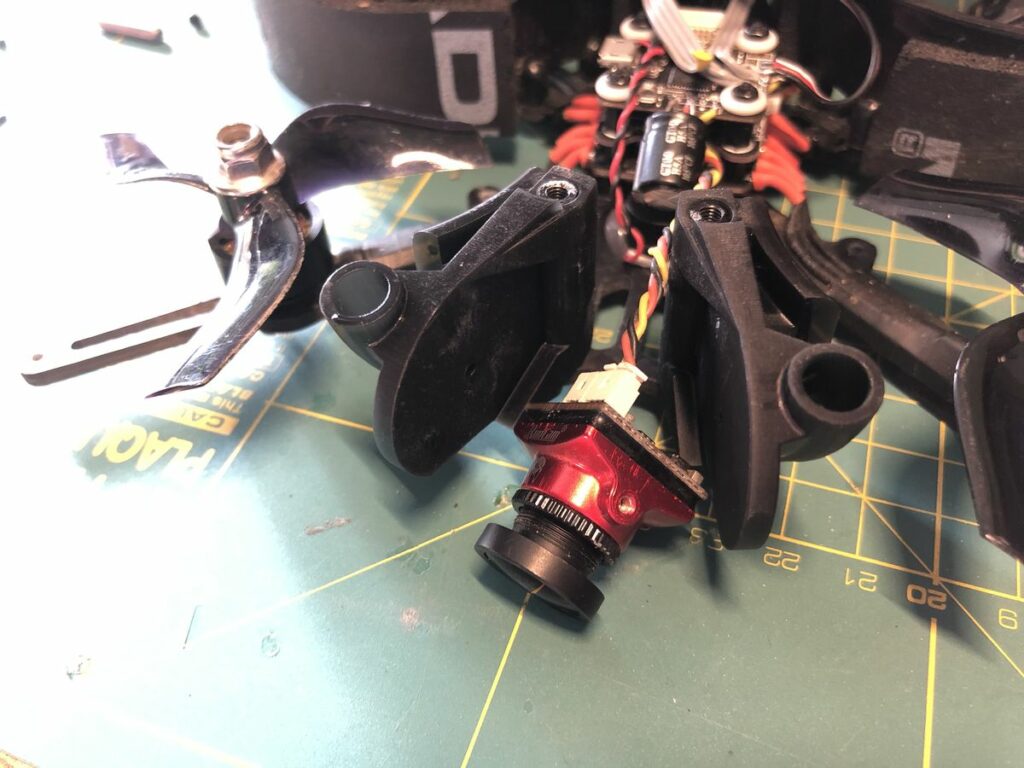
And screw camera (I’m using the best one – RunCam micro Eagle) in angle you liked (10° for me)
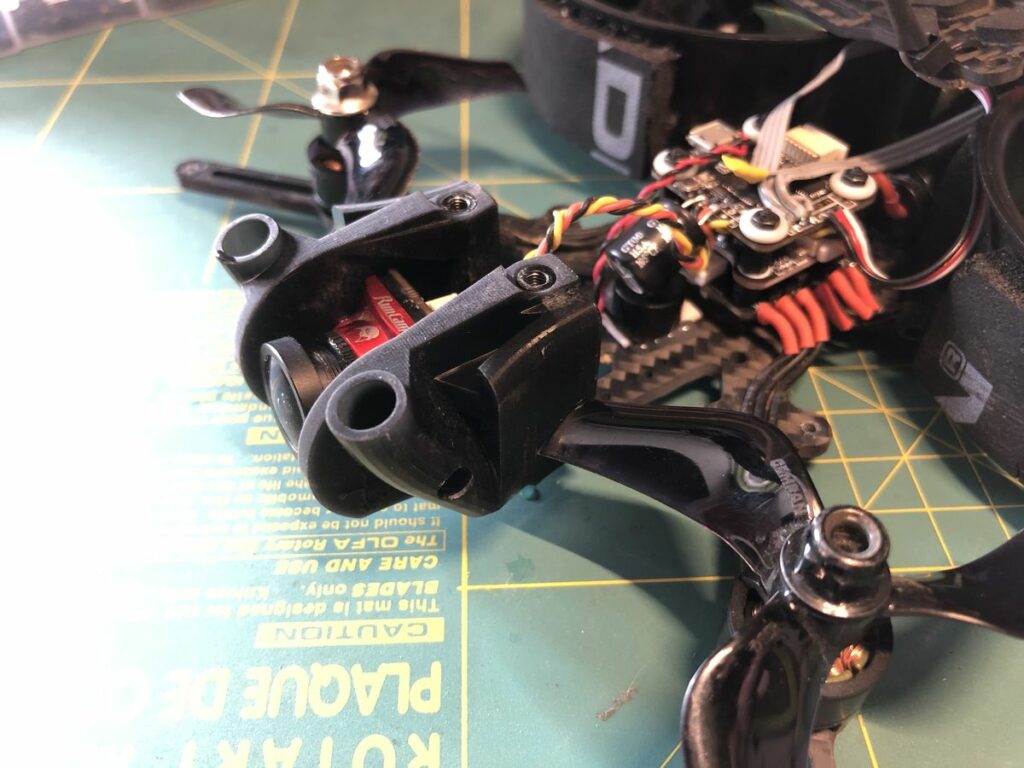
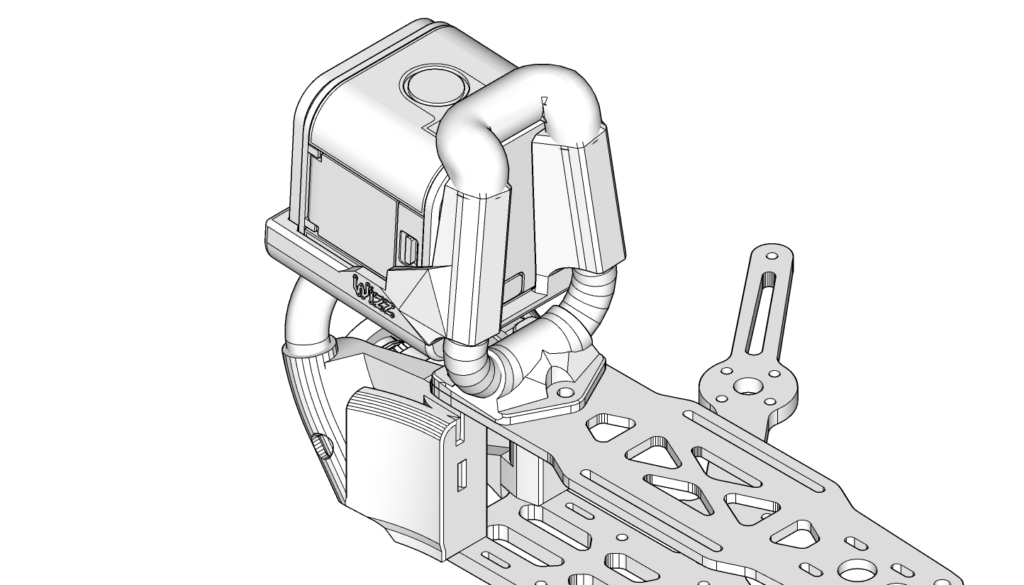
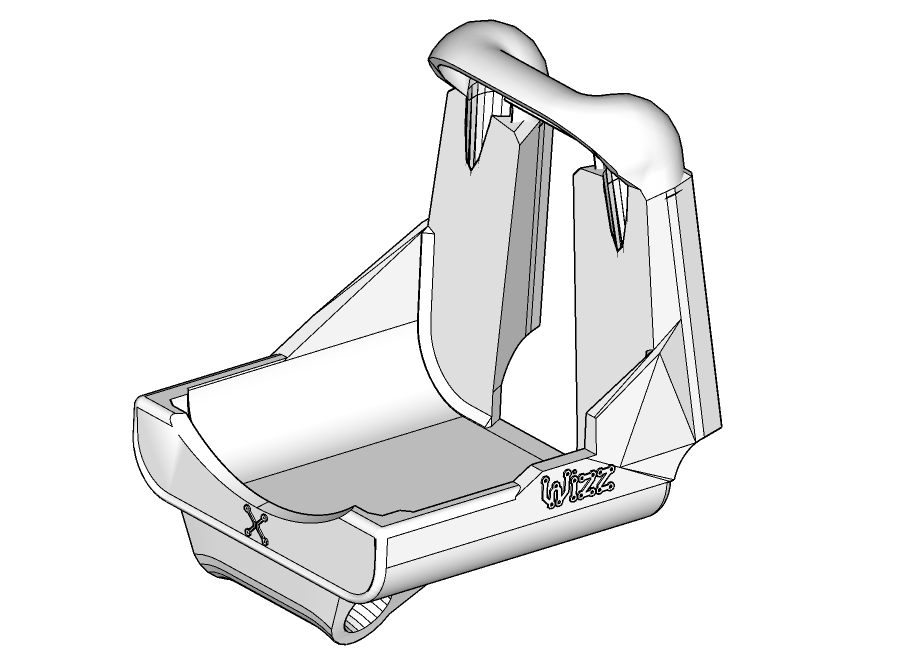
- Back gopro holder – this is back tube part for hodling gopro fixture via silicon tubes in back side (3D model here)
Put the top plate on your frame with and screw back Gopro holder there (BTW, I’m using Loctite to glue all the screws):

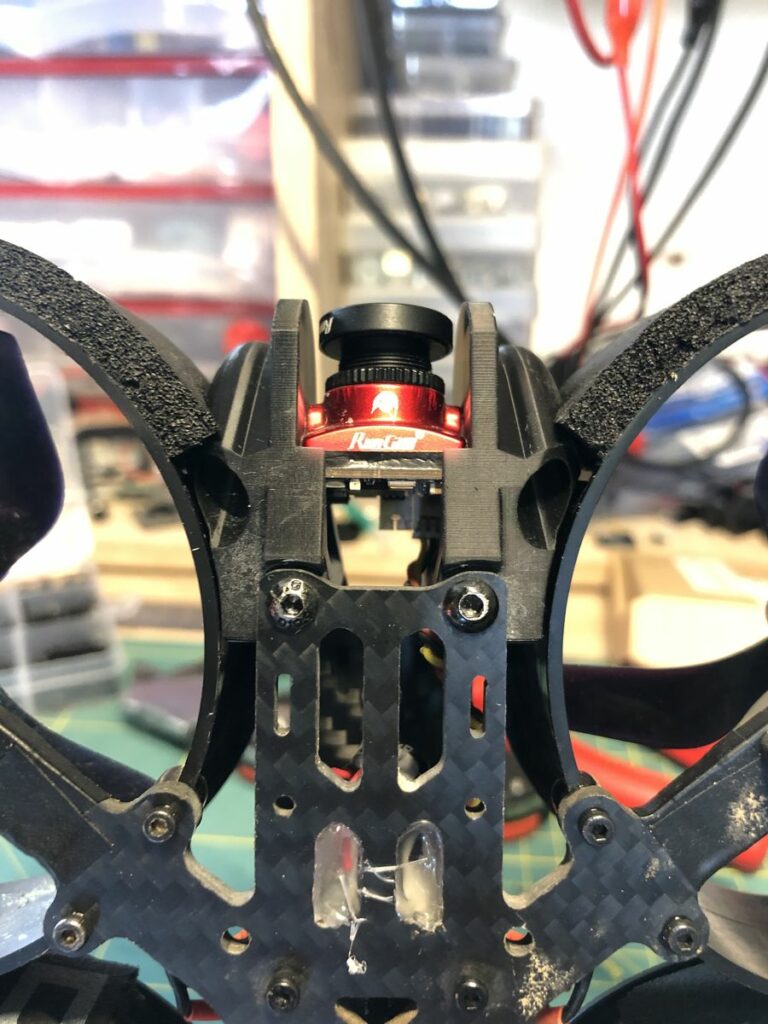
- ReelSteady Gopro holder – this is main Gopro fixture with possibility to insert Gopro inside (3D models here). I have more models as well – light, tough and super tough. I will post new article later about that.
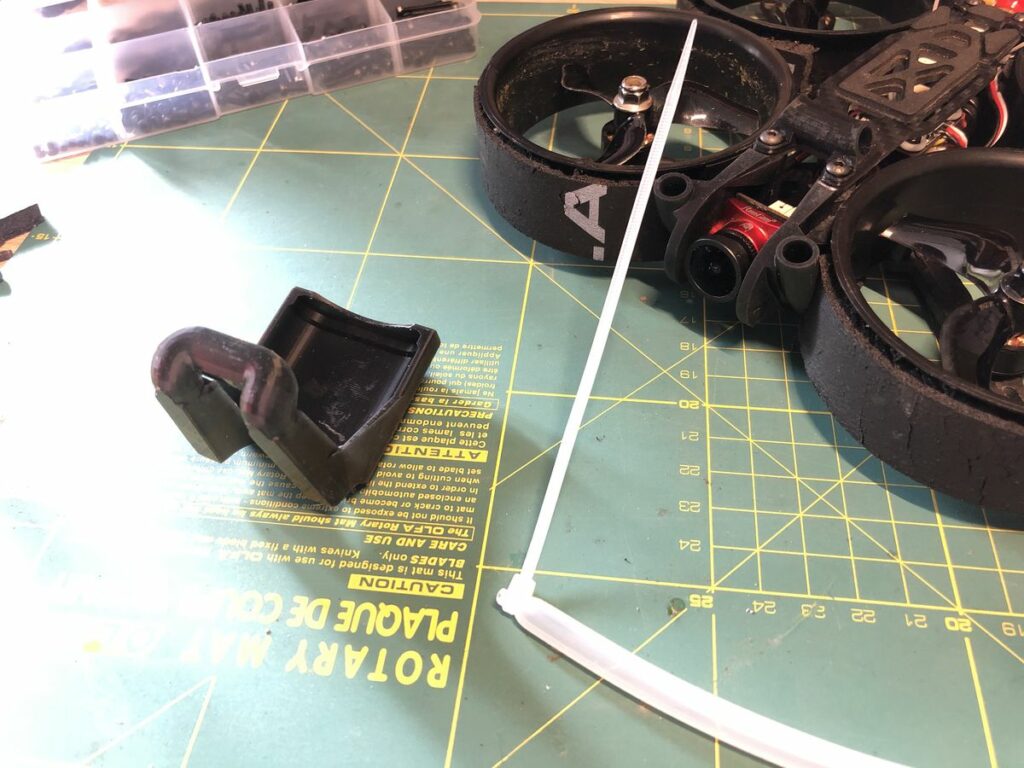
So to fix the holder to the frame you need to put silicon wires thru all the tubes.For me, zip tie works well.

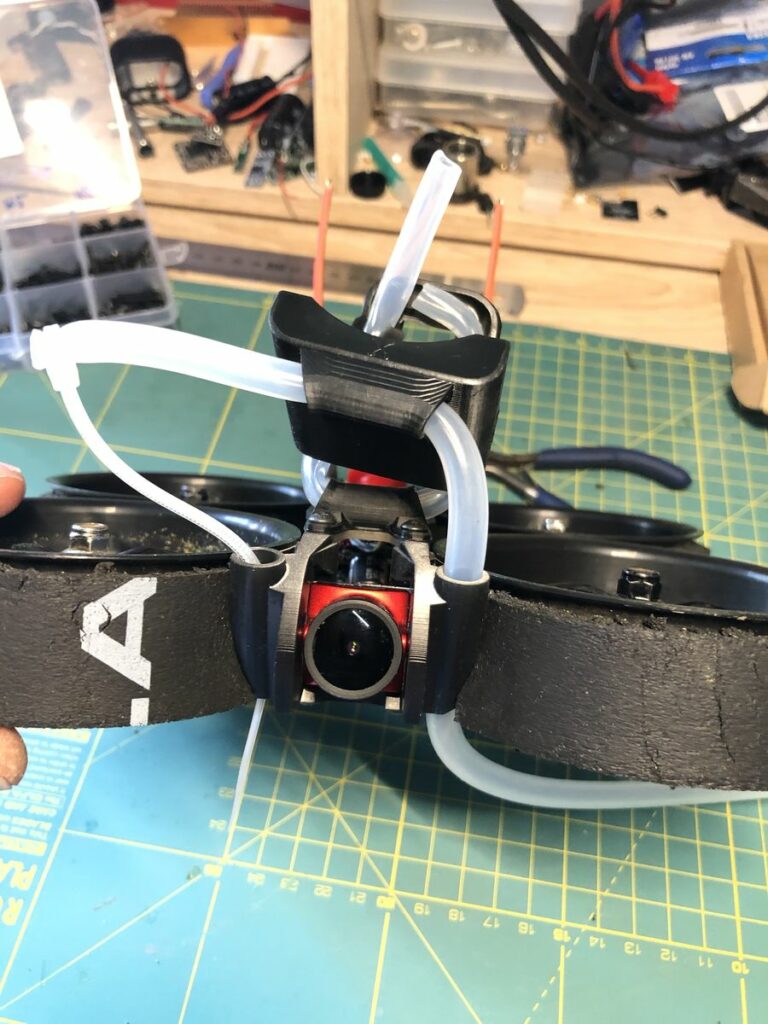
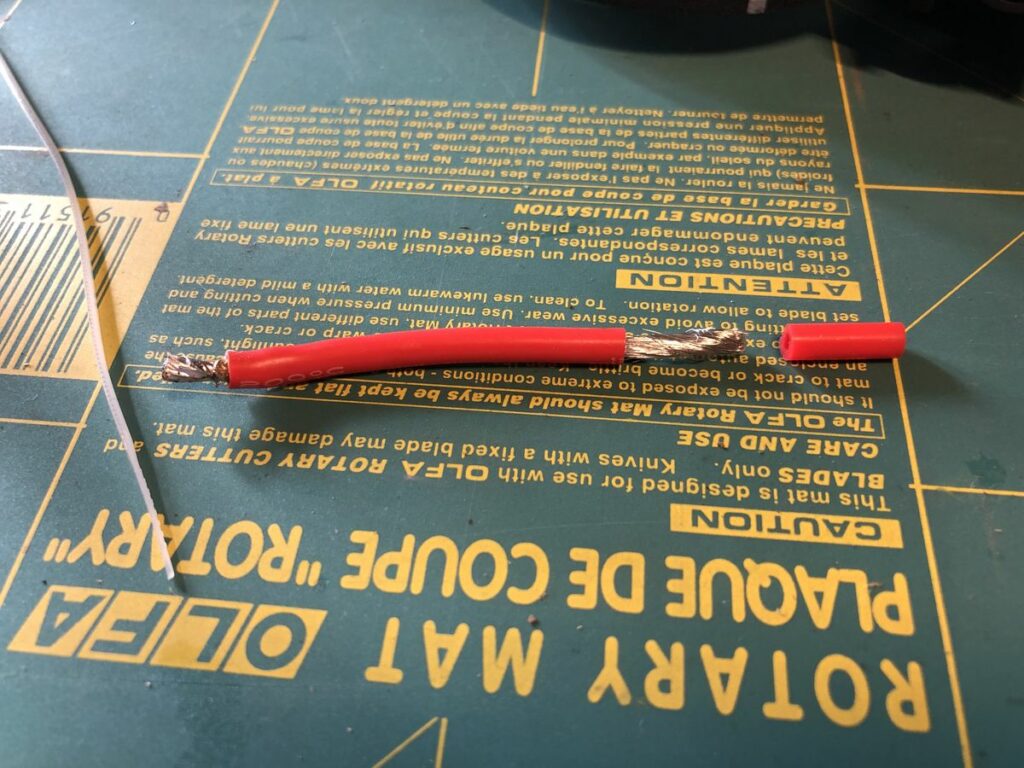
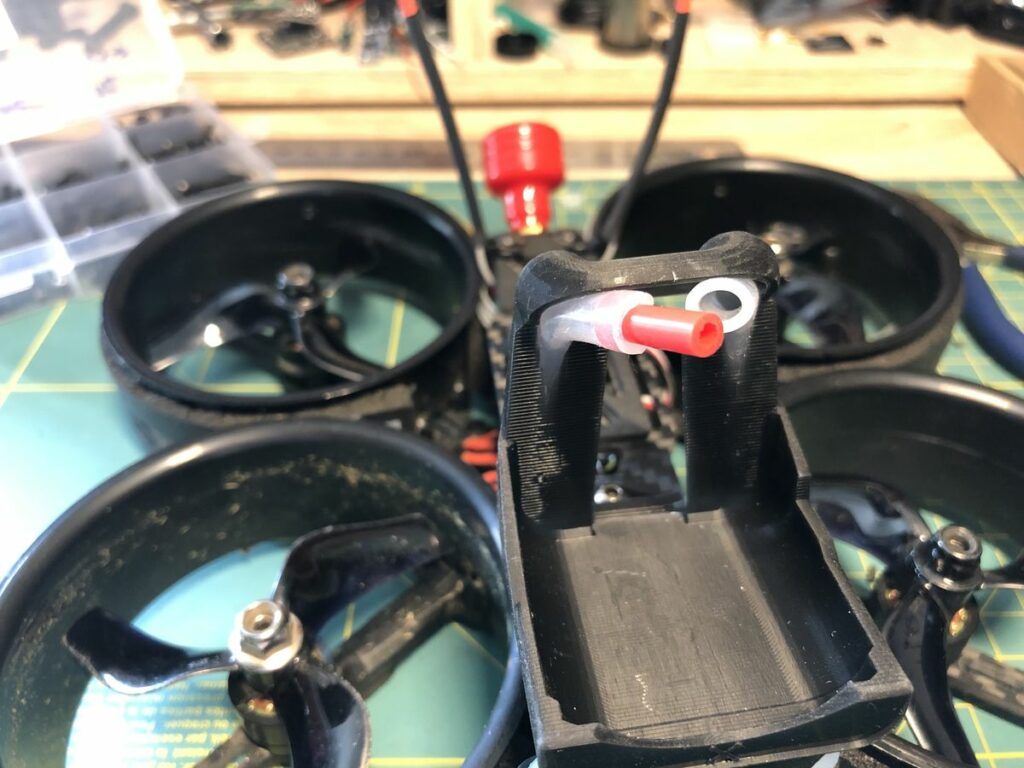
Rear part silicons can be joined together with piece of insulation from 12AWG cable
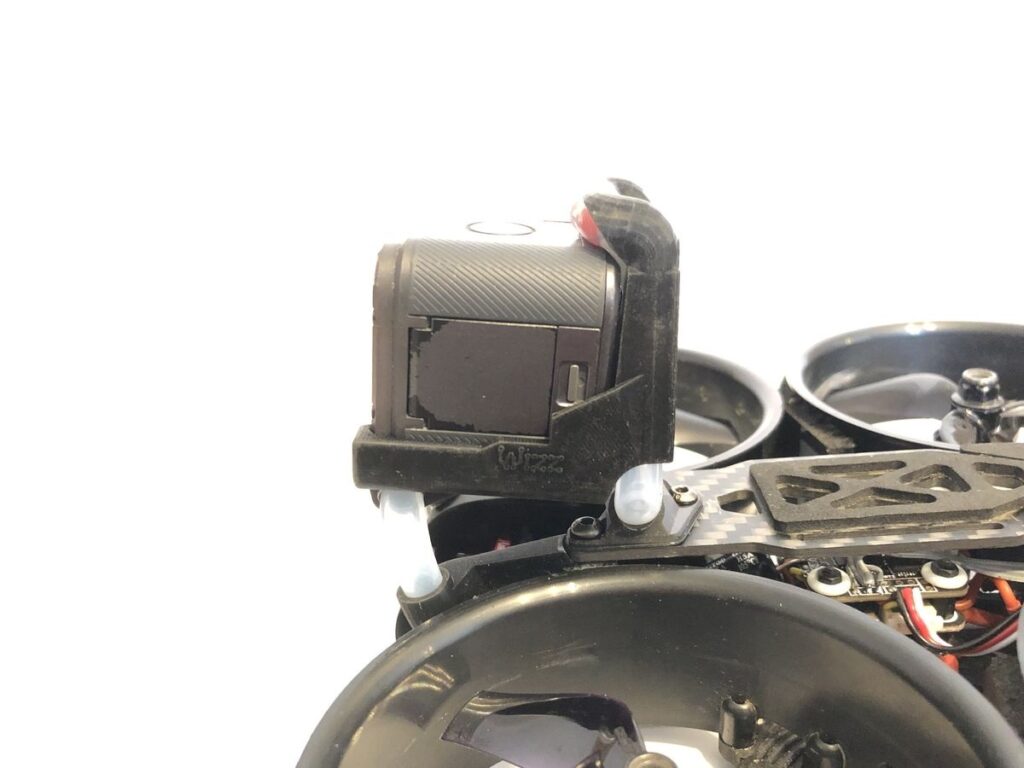
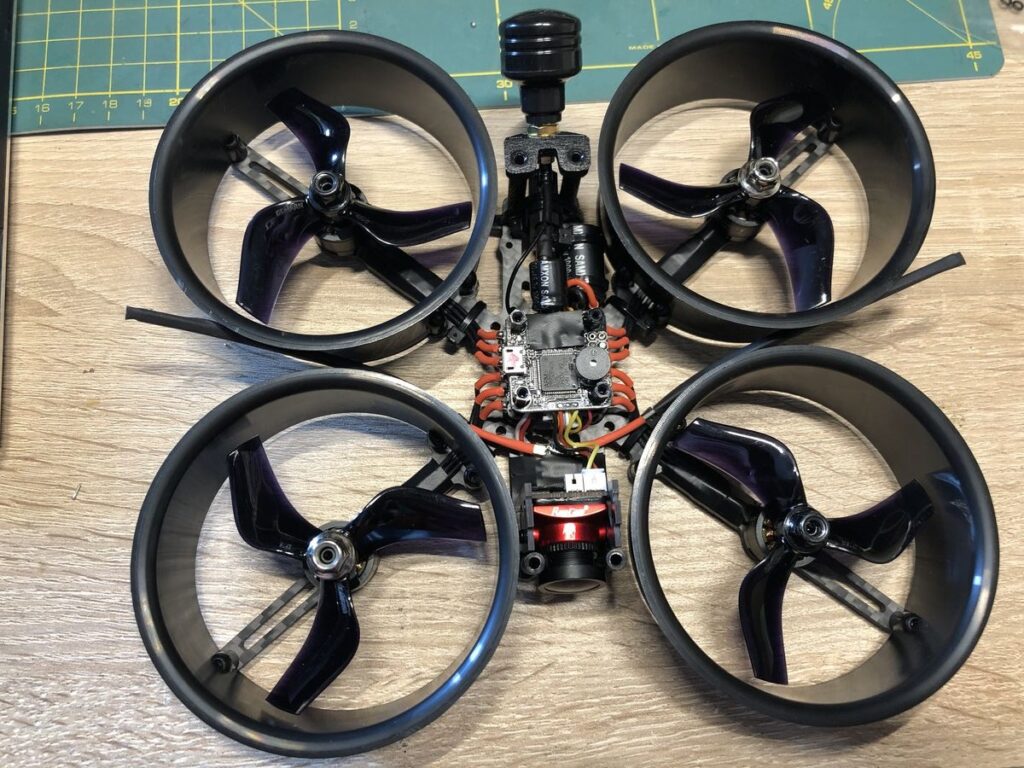
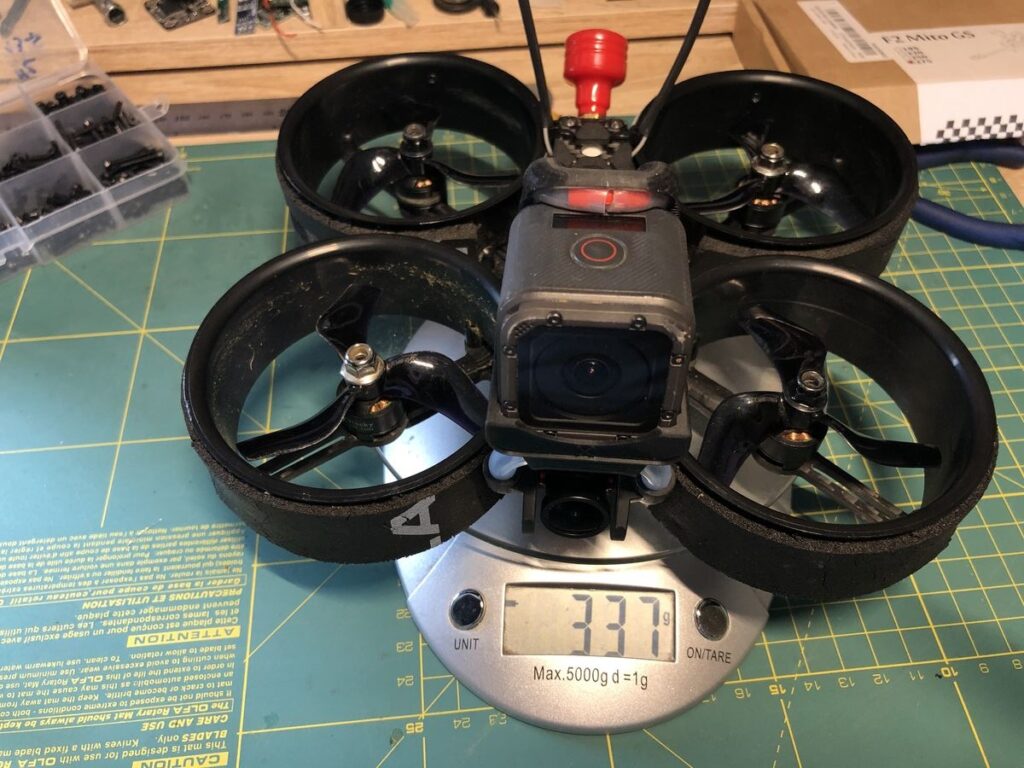
- And that’s it, you can fly Reel Steady. Weight of the drone is 337g with Gopro, without Lipo
here you can see my first fly:
- another 3D parts for cloud:
spacers for rings (3D models here)
capacitor holder and RX holder (3D models here)

XT60 holder (3D models here)
Zip tie holder (3D models here)
One thought on “VILKO – Smooth ReelSteady cinewhoop for a 100$”